Too awesome! As someone who also has a tiny printer, I'm really curious about your post processing techniques. What did you use to glue the larger parts together? And how did you achieve that shiny and smooth finish?
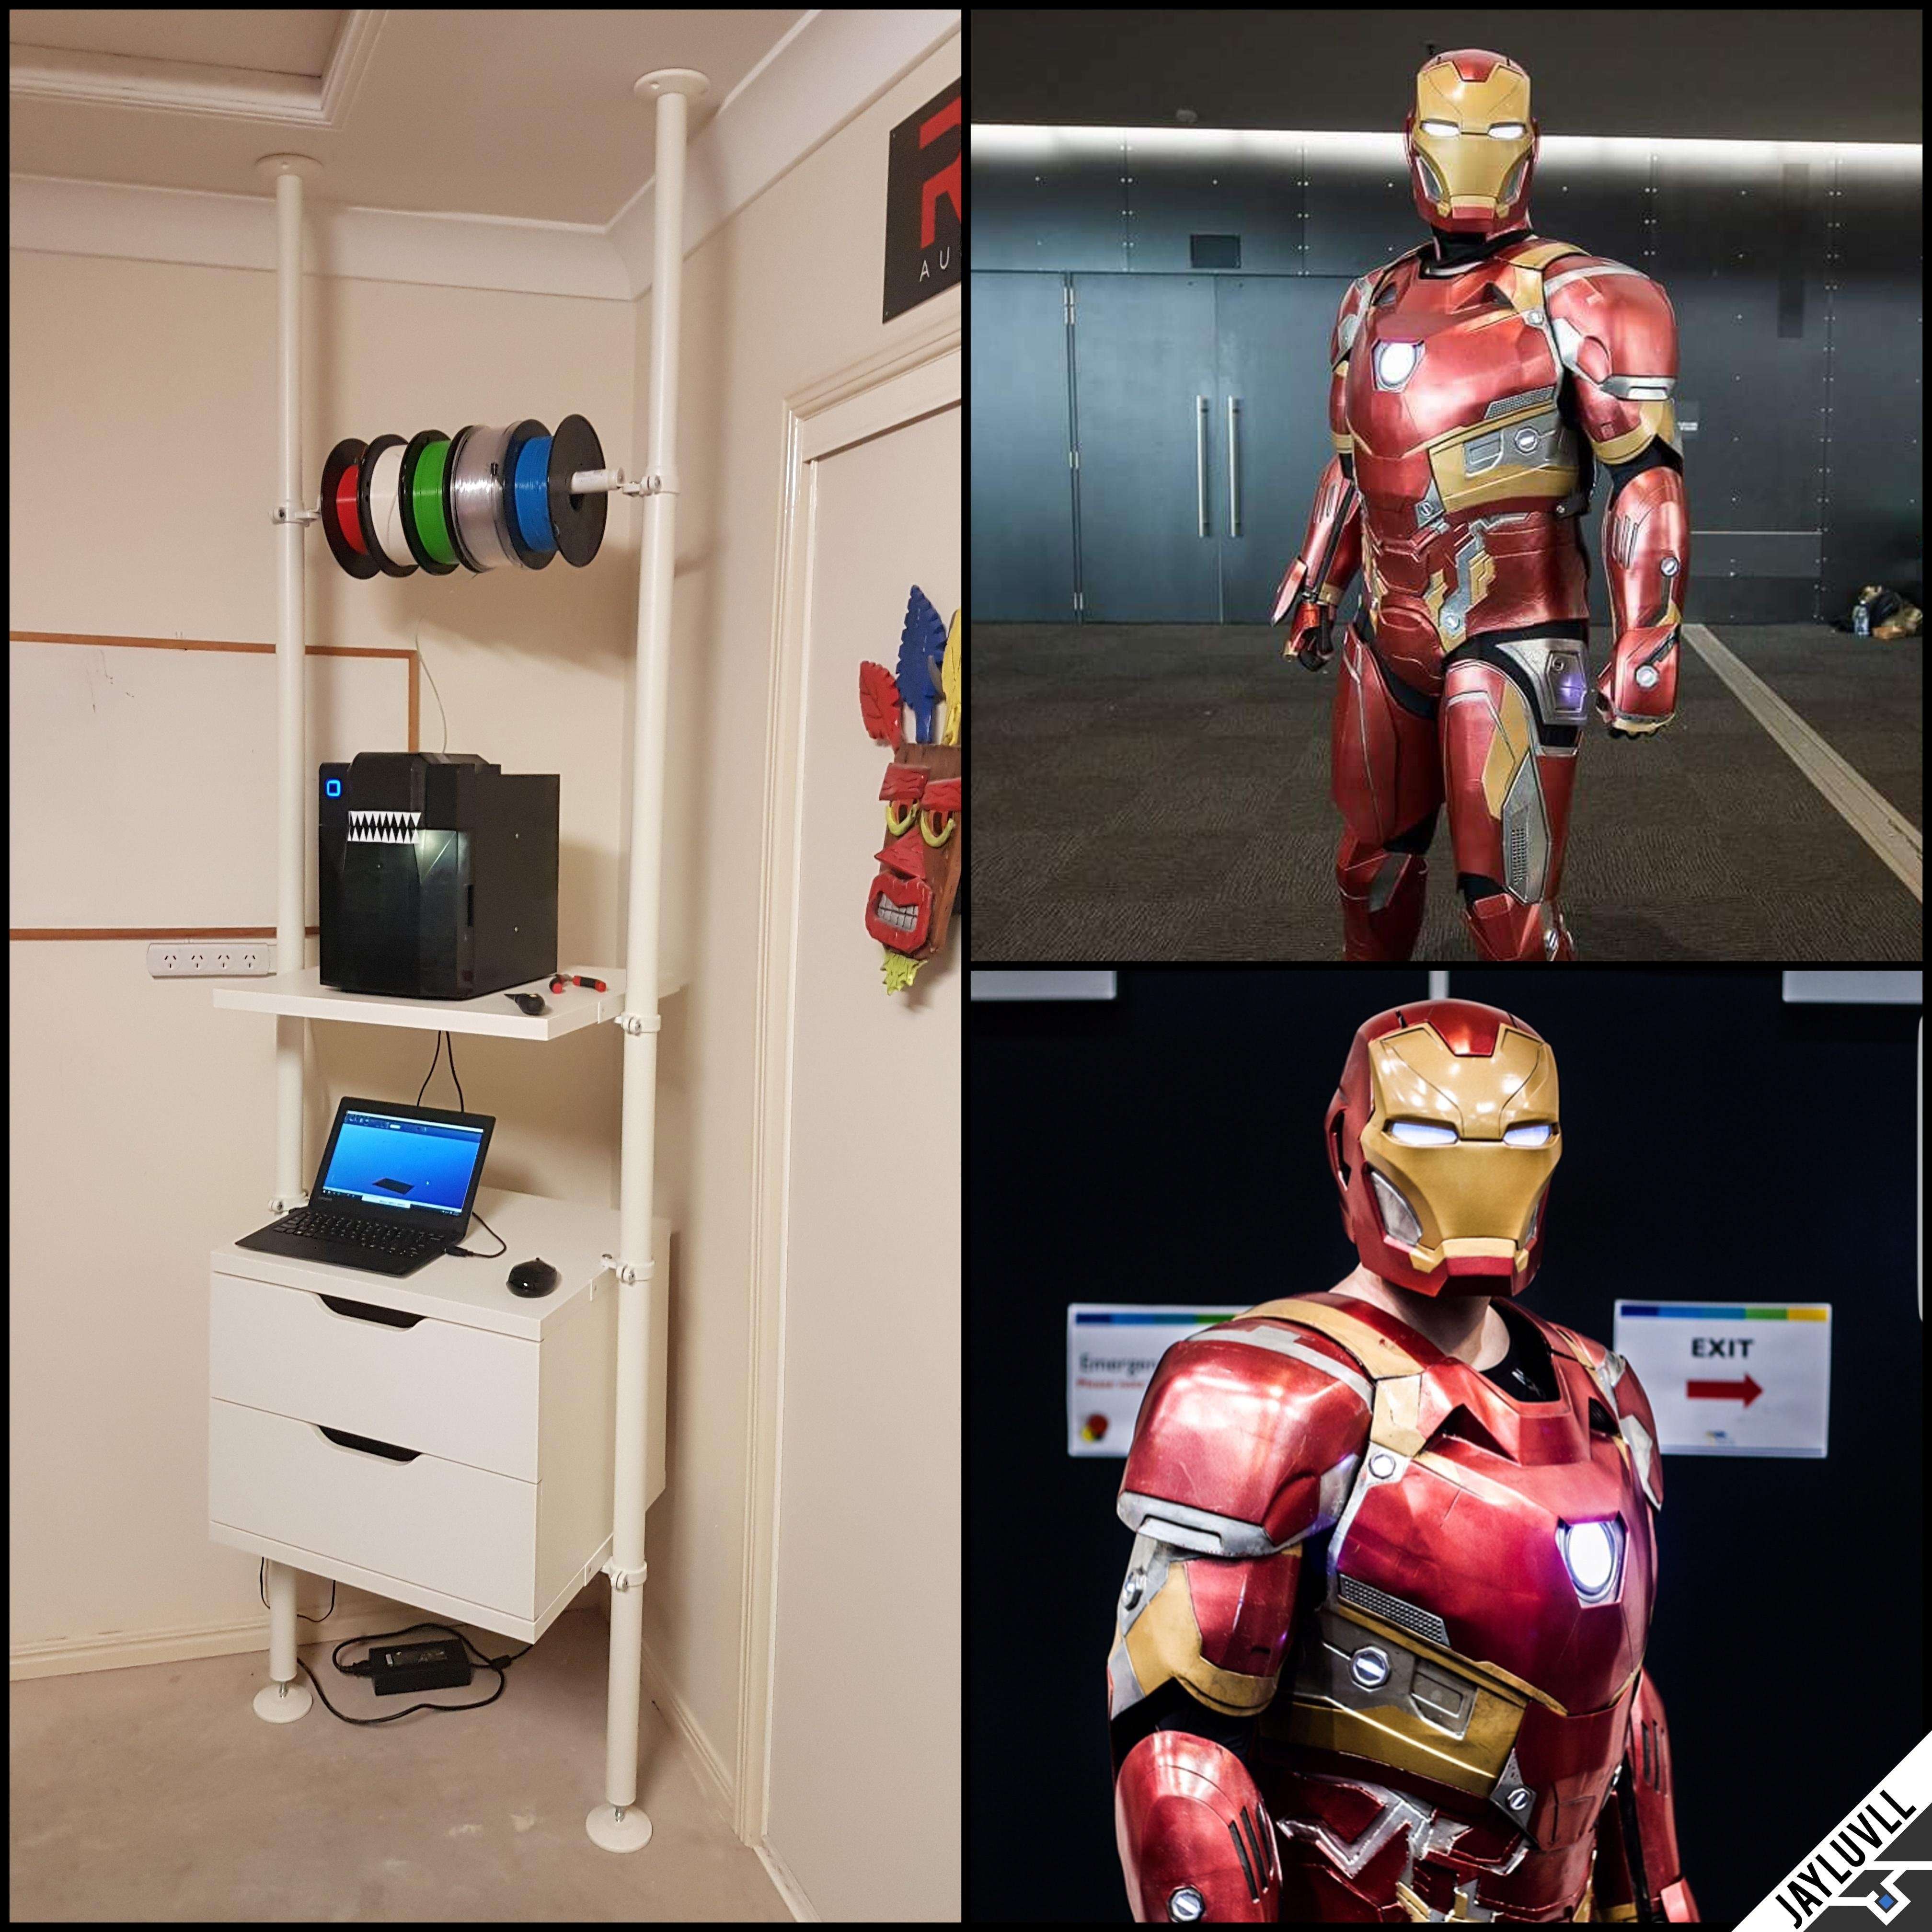
This is my Iron Man Mk. 46 (Civil War / Homecoming variant), which, except for the EVA foam, shins and boots, is entirely 3d printed.
Printed in 152 pieces (with about 8-10 reprints due to breakage and resizing) all in ABS, on my Up Mini (max build size 12cm3). Printed over the course of 6 months, totalled about 8kg of ABS. Each part acetone welded and large pieces (chest, back, thighs) backed in fibreglass. Neck was finished after these photos.
I finished each piece using body filler and sanding many many times, before using spray on filler/primer and fine sanding a few times before paint. The recent Matterhackers/Punished Props collab video describes the process I used nearly exactly (could have used that video months ago!): https://youtu.be/eGrRKdy6x7I
All lights are Arduino Neopixels, initially as solo circuits to be wired up in a network for full color changes in the future. Eyes are electroluminescent panels with a tiny gap at the top that I can see over.
Files are available through Onekura.com. Mine looks a little different as I had an earlier version of the files before Civil War came out. Files needed some work before suitable for wearing, and some pieces were unsuitable as they prevented safe movement.
Yes, the files are paid files, but the craftsmanship is fantastic and, in my opinion, is well worth the price. Sorry, but no, I will not share the artist's STLs for free, please credit and purchase from the original artist here: https://www.onekura.com/product/mark-46-printable-suit/
The suit is heavy around the shoulders, but overall is reasonably comfortable to wear. Airflow is fine, bit hot in the chest but ive worn worse in my other costumes. Finger mobility is an issue, I've since replaced the fingertips with removable plastic tips so I can use my phone.
Total cost of materials is about AU$600 plus the cost of the files. I could probably have made it cheaper using cheaper paint, simple LEDs and lower quality ABS, but there was some experimentation to get it right and I learned a lot in the process.
choconeko on July 13rd, 2017 at 00:19 UTC »
Too awesome! As someone who also has a tiny printer, I'm really curious about your post processing techniques. What did you use to glue the larger parts together? And how did you achieve that shiny and smooth finish?
Dsk001 on July 13rd, 2017 at 00:26 UTC »
Could you provide a link to the stls that you use. This is a dream of mine to print ever since getting a 3d printer.
JayLuvLL on July 13rd, 2017 at 00:56 UTC »
Bonus extra pics: https://imgur.com/gallery/VWj55
This is my Iron Man Mk. 46 (Civil War / Homecoming variant), which, except for the EVA foam, shins and boots, is entirely 3d printed.
Printed in 152 pieces (with about 8-10 reprints due to breakage and resizing) all in ABS, on my Up Mini (max build size 12cm3). Printed over the course of 6 months, totalled about 8kg of ABS. Each part acetone welded and large pieces (chest, back, thighs) backed in fibreglass. Neck was finished after these photos.
I finished each piece using body filler and sanding many many times, before using spray on filler/primer and fine sanding a few times before paint. The recent Matterhackers/Punished Props collab video describes the process I used nearly exactly (could have used that video months ago!): https://youtu.be/eGrRKdy6x7I
All lights are Arduino Neopixels, initially as solo circuits to be wired up in a network for full color changes in the future. Eyes are electroluminescent panels with a tiny gap at the top that I can see over.
Files are available through Onekura.com. Mine looks a little different as I had an earlier version of the files before Civil War came out. Files needed some work before suitable for wearing, and some pieces were unsuitable as they prevented safe movement.
Yes, the files are paid files, but the craftsmanship is fantastic and, in my opinion, is well worth the price. Sorry, but no, I will not share the artist's STLs for free, please credit and purchase from the original artist here: https://www.onekura.com/product/mark-46-printable-suit/
The suit is heavy around the shoulders, but overall is reasonably comfortable to wear. Airflow is fine, bit hot in the chest but ive worn worse in my other costumes. Finger mobility is an issue, I've since replaced the fingertips with removable plastic tips so I can use my phone.
Total cost of materials is about AU$600 plus the cost of the files. I could probably have made it cheaper using cheaper paint, simple LEDs and lower quality ABS, but there was some experimentation to get it right and I learned a lot in the process.
Further pics and the build log are at my FB page: www.fb.com/JayLuvLL