Last November, Nintendo surprised everyone by going back to its roots and releasing the NES Classic. The delightful emulator/nostalgia-fest sparked unanticipated demand, including near-instant supply issues and 200-percent-plus markups in secondary markets. So in December of 2016, we decided to build our own version instead. Since Nintendo bizarrely announced that it won't be making any more of the hard-to-find mini consoles this week, we're re-running this piece to help those of you with a DIY streak once again build your own. Hardware recommendations have been updated to reflect current availability and pricing for April 2017.
Against my better judgment, I’ve tried a couple of times to snag one of those adorable little $60 mini NES Classic Editions—once when Amazon put some of its limited stock online and crashed its own site, and once when Walmart was shipping out small quantities every day a couple of weeks ago. In both cases, I failed.
But the dumb itch of nostalgia can’t always be scratched by logical thoughts like “do you really need to pay money for Super Mario Bros. 3 again,” and “Castlevania II: Simon’s Quest is probably the weakest of the three NES Castlevania games.” Since it’s not entirely clear if or when those little mini NESes will become readily available, I decided to funnel that small wad of expendable cash and the desire for some nostalgia-fueled gaming into a DIY project.
It turns out that the NES Classic Edition is just a little Linux-powered board inside a cute case, and it’s totally possible to build your own tiny Linux-powered computer inside a cute case without spending much more than $60. And by using the Raspberry Pi and freely available software, you can build something capable of doing a whole heck of a lot more than playing the same 30 NES games over and over again.
I find it helpful when pursuing a new DIY project to start with a list of needs and wants and go from there—possibly a leftover from my IT days helping the non-technically inclined (and actively technology-averse) make purchasing decisions. With my homebrew NES Classic, I wanted to:
Spend something close to the same $60 that the NES Classic Edition costs, though I would be OK as long as the bill of materials came in under $100 (because that’s roughly as many Amazon points as I have to dedicate to this project).
Make something similar in size to the NES Classic Edition.
Make something powerful enough to easily emulate 8- and 16-bit consoles—anything above and beyond that would be great, too, but for these prices you won’t be emulating many games released after the end of the '90s.
Include integrated Bluetooth and Wi-Fi for wireless controllers and easy network/Internet connectivity, respectively.
Build something that, once fully configured, would provide a relatively easy-to-use and attractive console-like UI.
With all that in mind, these are the components I settled on (prices and components updated on 4/14/2017):
With the 32GB microSD card and one controller, that bill of materials comes to around $89, which is near the top of my price range but still fairly reasonable for what you get. Many of these components are also common enough that you could save some money by just using things you already have lying around (and for our purposes I’m already assuming you don’t need an HDMI cable because it’s 2017 and we’re all lousy with HDMI cables; here’s a 3-foot one for $5 and a 6-foot one for $7 if you need).
Putting our little box together is ridiculously easy, and you ought to have no problem with it even if you’ve never opened up a PC tower in your life. The official Pi case splits into five separate pieces, all held together with retention tabs that pull away with firm pressure: the base, the top, the lid, and both sides/port covers.
Completely disassemble the case by pulling off the sides and then pressing in on the arrow tabs so you can pull up the top. Then, take the Pi from its box and slide it into the base, making sure that the microSD slot lines up with its cutout on the front of the case. Don’t force the board into the case—if you’re having trouble, put the SD slot side of the Pi into the case at a 45 degree angle, and then lower the back end of the Pi into the case. Small plastic tabs should stick up out of the board’s back two mounting holes if you did it correctly. Then, snap the top and sides of the case back together, and you’re done! If you bought heatsinks, you can stick them to the chips on the top of the board at any point in this process, including after the Pi is already in the case.
That’s the easy part. Software is more tricky, though not insurmountably so.
For the next parts of the process, you’ll need:
A Mac, Windows, or Linux PC with an SD card slot for loading the Pi’s operating system.
A USB keyboard or gamepad for setup, maintenance, and gameplay.
Making retro game consoles is a fairly common use case for the Pi, so there are a few different operating system choices out there. Most of them involve running libretro and its emulators on top of the Raspbian operating system, and the most prominent also include the EmulationStation frontend.
The best supported, most active of these options is RetroPie, which mixes all of these ingredients together into a package that’s relatively easy to use, visually appealing, and customizable. It also includes a huge number of emulators for both consoles and various personal computers, though, as I mentioned, nothing newer than the original PlayStation will run consistently well on the Pi 3’s hardware (the newer systems are confined to the x86 version of RetroPie, which looks and works basically the same but is built on top of Ubuntu and can run on more powerful and expensive hardware).
The first thing you’ll need to do is drop a RetroPie boot image on your SD card. Since RetroPie is Linux-based and uses the ext4 filesystem, Windows PCs and Macs can’t natively interact with the card once you’ve reformatted it. The RetroPie download page is here. The imaging tool that the RetroPie developers recommend differs depending on your operating system—Win32DiskImager for Windows, Apple Pi Baker for macOS, and Unetbootin for Linux—but the basic process is the same. Decompress the .gz file you downloaded from the RetroPie site, open the tool, and select the .img file you just unzipped. Point the tool at your SD card—if the tool doesn’t see it, you may need to format it as a FAT32 disk first—and let it do its thing.
Once the disk image has been copied to the SD card, pull it out and put it into the Pi, and then plug the Pi into the display with an HDMI cable, plug a controller or keyboard in, and then connect to power. The system ought to boot up and run through some first-time setup things (if the Pi’s red indicator light comes on but nothing else happens, the card may not be formatted correctly, and you should try again).
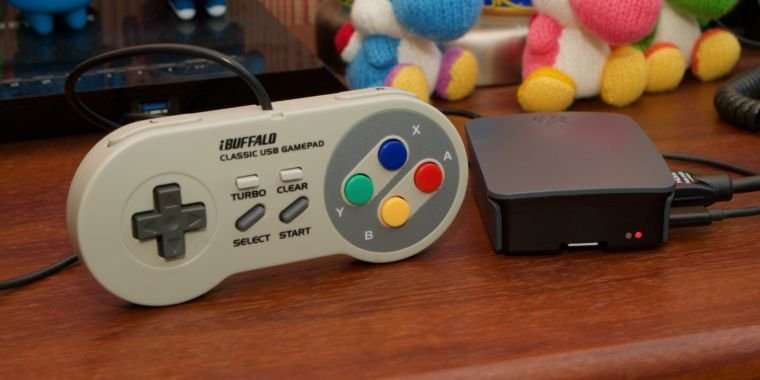
If you did everything right, after a couple of minutes you'll see an EmulationStation prompt asking you to connect and configure a gamepad. Press down any button on your gamepad, and you’ll automatically be asked to map all the controller buttons. If you’re using the Buffalo gamepad I bought, it will ask you to map some buttons the gamepad doesn’t have; just hold down any other button on the gamepad to skip them, and then hold down any button again to enter the main EmulationStation UI.
All you’ll see by default is an entry for RetroPie that gives you access to a bunch of settings—this is totally normal, and you’ll see entries for other systems pop up as you transfer ROMs to the Pi. You can navigate through many of these configuration menus with a gamepad, but heading into any of the RetroPie settings kicks you out of the slick EmulationStation frontend into a text-driven, more DOS-like tunnel of menus. If you need to enter text or even hit the Esc key to leave any of these menus, you’ll have to hook up a USB keyboard first.
Here’s a short list of stuff to do before we dig into the fun part. From here on out I’ll assume you have both a keyboard and a gamepad to use.
Assuming your HDMI cable is handling video and audio, go to the Audio settings in the RetroPie menu and select “HDMI” from the list of outputs. The default is “Auto,” but forcing HDMI can apparently solve some audio problems.
If you’re not using wired Ethernet, go to “Wifi” in the RetroPie menu and connect to a Wi-Fi network. The Pi 3 natively supports 2.4GHz 802.11n, which isn’t great, but it’s fine for the price and good enough for our purposes.
Once you’re on the Internet, access the command line by pressing F4 on your keyboard or by pressing Start on the gamepad, selecting Quit, and then quitting EmulationStation.
Take note of your box’s IP address , which will be displayed along with other system information.
, which will be displayed along with other system information. Type passwd if you’d like to change the default account’s password for security purposes. The default username is pi and the default password is raspberry .
if you’d like to change the default account’s password for security purposes. The default username is and the default password is . Type sudo apt-get update and then sudo apt-get upgrade . The first command refreshes the list of available packages from the device’s repositories, while the second actually downloads and installs those updates. Go ahead and install all updates when prompted. Once it’s set up, our RetroPie box will be pretty appliance-like; you could disconnect it from your network and never worry about updating it again if you wanted. But new versions of both Raspbian and RetroPie are released periodically, and if you intend to keep the RetroPie box on your network permanently, you should at least install updates periodically.
and then . The first command refreshes the list of available packages from the device’s repositories, while the second actually downloads and installs those updates. Go ahead and install all updates when prompted. Type sudo shutdown –r now to reboot your box, which will bring it back into the EmulationStation UI.
At this point you’ve got a basic RetroPie setup running, you’ve connected your box to your network and you know its IP address, and you’ve updated EmulationStation, its emulators, and the underlying Raspbian operating system to the latest versions. Now it’s time to load up some games.
iisdmitch on April 17th, 2017 at 15:41 UTC »
I actually just built one this weekend. I really wanted the NES classic and couldn't find one, but when I found about this, I jumped on it. It runs really well for most platforms. I have issues with N64 but that's about it.
16bitfighter on April 17th, 2017 at 14:52 UTC »
Just cause it's relevant, my build in a PS1 shell: http://imgur.com/gallery/Pcocl
harrisonisdead on April 17th, 2017 at 14:50 UTC »
Personally I like Lakka (Lakka.tv) much better than Retropie. It's isn't as known or popular, but it can run on the Pi as well as on any old computer (even your old laptop from ~10 years ago) and in my experience runs more smoothly.
EDIT: As /u/Thinkinruby outlines below, Lakka hasn't been around as long as Retropie, but it has the potential to become something great in time. I will say that it does take a little know-how (or Googling) for some basic configurations. What I really like about it is that it is easy to use the minute you install it without making any changes (as long as you are using one of their accepted input methods, otherwise expect some tinkering), but everything is easily customizable with a little bit of knowledge. I personally think the out-of-the-box RetroArch look is pretty great, but again a lot can be tinkered with if you really want to make it your own.
If you already are using RetroPie and everything is working out for you, there really isn't an urgent need to check out Lakka. I have had very few problems with either option (neither is perfect, of course), so it really just came down to the little things that overall made me choose Lakka.